Consul Service Mesh across a private Raspberry Pi and a public Cloud

photo by Alina Grubnyak on Unsplash
In my previous post, I wrote about expanding a Consul and Nomad cluster in a private lab to a public cloud. All the nodes, a Raspberry Pi on-premise, or a VM in a public cloud share the same private network provided by Tailscale, and workloads running on Nomad are spread across both environments. Everything is working well, but after a few days running this setup, I wasn’t sure if using Tailscale is the right approach for scaling out a local Nomad cluster to the cloud. Don’t get me wrong; I still love Tailscale; it is easy to install and use and is a perfect fit for accessing servers from everywhere. But in a more dynamic environment, where nodes are more cattle instead of pets, can come and go when required, other solutions may be better.
The reason for using Tailscale at first is because all the nodes in a Consul cluster should be able to connect. In terms of Consul, I’ve built a single datacenter with nodes running on-premise and in the cloud, which may seem a little bit odd when you think about it.

In this post, we look at a completely different approach to expand a cluster running on a Raspberry Pi to the cloud with Consul Connect and its advanced features like Mesh Gateways.
Consul Connect provides service-to-service connection authorization and encryption using mutual Transport Layer Security (TLS). Applications can use sidecar proxies in a service mesh configuration to establish TLS connections for inbound and outbound connections without being aware of Connect at all.
Consul has already for long time support for joining multiple datacenters which operate independently and only communicate over the WAN on port 8302.
With WAN federation via mesh gateways allows for Consul servers in different datacenters to be federated exclusively through mesh gateways, without the need that all Consul servers in every datacenter must be able to reach each other over their WAN-advertised network address.

Secure Service Mesh Communication Across Kubernetes Clusters (source: HashiCorp Learn)
First, we deploy a Consul cluster, with WAN federation via mesh gateway enabled, on k3s running on a Raspberry Pi. That installation will act as our primary datacenter. Next, we build a second datacenter on a public cloud provider and join this second and the primary datacenter. Finally, we will deploy a multi-tier application across the clusters to demonstrate inter-datacenter communication.
How to achieve all this is already explained in detail in the Secure Service Mesh Communication Across Kubernetes Clusters tutorial from HashiCorp.
Yet, there are some specific steps to take when using a Raspberry Pi in a private network.
Envoy Proxy on a Raspberry Pi
A Connect-aware proxy enables unmodified applications to use Connect. Consul includes its own built-in L4 proxy and has first-class support for Envoy. Currently, Envoy is the only proxy with mesh gateway capabilities in Consul.
Unfortunately, there are no Envoy binaries or Docker images available for the ARM architecture at the time of writing. They are working on supporting arm64, but for the time being, you have to build Envoy for arm64 yourself or use the binary and Docker image that I’ve build already.
update July 14, 2021: starting from Envoy 1.16, support for ARM64 architecture is included and available in the official Docker images.
Exposing private service to the public

As the Raspberry Pi is running in an internal network, we have to find a way to expose the mesh gateway to the outside world so that other datacenters can connect to the private cluster. In another post, I’ve already mentioned inlets, a cloud-native tunnel. Now that we are deploying our service mesh on a lightweight Kubernetes distribution, k3s, we can use the inlets-operator to automate the creation of an exit node for a Kubernetes LoadBalancer service.
“The operator detects Services of type LoadBalancer, and then creates a Tunnel Custom Resource. Its next step is to provision a small VM with a public IP on the public cloud, where it will run the inlets tunnel server. Then an inlets client is deployed as a Pod within your local cluster, which connects to the server and acts like a gateway to your chosen local service.”
Prerequisites
For this tutorial, I have prepared the following:
- a DigitalOcean Access Token
- a Kubernetes cluster running on DigitalOcean (any other provider is also ok)
- an inlets PRO license
- tools installed locally:
- kubectl, configured with one context for the cluster on DigitalOcean
- helm (version 3), the package manager for Kubernetes
- k3sup, lightweight utility to get from zero to KUBECONFIG with k3s on any local or remote VM.
- arkade, a Golang CLI with strongly-typed flags to install Helm charts and apps to your cluster in one command.
- a Raspberry Pi, running Ubuntu 20.04 64bit, with a proper hostname (
orion-rpi4-01) and IP address (192.168.0.51)
Security Warning This tutorial is not for production use. Although we enable gossip and TLS encryption, the Helm chart used, installs an configuration of Consul without ACL enabled.
Building the primary datacenter a Raspberry Pi
Create a k3s cluster
The easiest way to get a k3s cluster ready is by using the k3sup tool:
$ k3sup install \
  --ip 192.168.0.51 \
  --user ubuntu \
  --context orion-rpi4 \
  --merge \
  --k3s-extra-args '--no-deploy servicelb --no-deploy traefik'
By default, k3s comes with a load balancer, known as Klipper Load Balancer, and Traefik as an Ingress Controller. In our case, we will let the inlets-operator handle LoadBalancer services, and we don’t need Traefik for the moment, hence the two --no-deploy flags to disable those features. After executing those two commands, a small single node k3s cluster is ready to use, and our kubeconfig is updated with a new context pointing to this cluster.
Note: for this demo, I only took a single Raspberry Pi, but if you have some other Raspberry Pis available, you could always add additional nodes to this k3s cluster, e.g.
$ k3sup join --ip 192.168.0.52 --server-ip 192.168.0.51 --user ubuntu
$ k3sup join --ip 192.168.0.53 --server-ip 192.168.0.51 --user ubuntu
Now switch to this new context and verify if the cluster is available.
$ kubectl config use-context orion-rpi4
Switched to context "orion-rpi4".
$ kubectl get nodes --context orion-rpi4 -o wide
NAME            STATUS   ROLES    AGE   VERSION        INTERNAL-IP    EXTERNAL-IP   OS-IMAGE             KERNEL-VERSION     CONTAINER-RUNTIME
orion-rpi4-01   Ready    master   54s   v1.18.6+k3s1   192.168.0.51   <none>        Ubuntu 20.04.1 LTS   5.4.0-1015-raspi   containerd://1.3.3-k3s2
Install inlets-operator with arkade
Using arkade, we can install the inlets-operator using a single command, arkade runs against any Kubernetes cluster.
$ arkade install inlets-operator \
 --provider digitalocean \
 --token-file $HOME/do-access-token \
 --license-file $HOME/inlets-pro-license.txt
It takes just a few seconds until the operator pod is running.
$ kubectl get pods -n kube-system --selector=app.kubernetes.io/name=inlets-operator
NAME                               READY   STATUS    RESTARTS   AGE
inlets-operator-7648d7477f-2dghh   1/1     Running   0          112s
From now on, every Kubernetes service of type LoadBalancer we create gets a public IP address on DigitalOcean, making the services accessible from the outside world via an inlets PRO tunnel.
Install Consul and Mesh Gateway
As mentioned earlier, the steps that follow are pretty much the same as explained in the tutorial available at the HashiCorp Learn website.
HashiCorp Helm Chart
First, we add the HashiCorp Helm chart.
$ helm repo add hashicorp https://helm.releases.hashicorp.com
"hashicorp" has been added to your repositories
Second, create a consul namespace and a secret with a gossip encryption key.
$ kubectl create namespace consul
$ kubectl create secret generic -n consul consul-gossip-encryption-key --from-literal=key=$(consul keygen)
Next, prepare a values.yaml file for our Consul deployment. With this configuration, we will:
- enable gossip encryption
- enable TLS encryption (required by the mesh gateway)
- enable Consul Connect
- enable a Mesh Gateway
- enable WAN Federation
- override the default, alpine based, Envoy image with an image compatible with arm64
global:
  name: consul
  datacenter: orion-rpi4
  image: hashicorp/consul:1.10.0
  imageEnvoy: envoyproxy/envoy:v1.18.3
  gossipEncryption:
    secretName: consul-gossip-encryption-key
    secretKey: key
  tls:
    enabled: true
  federation:
    enabled: true
    createFederationSecret: true

server:
  replicas: 1
  bootstrapExpect: 1
  storage: 5Gi

connectInject:
  enabled: true

meshGateway:
  enabled: true
  replicas: 1
Notice the createFederationSecret entry. This should only be set in this primary datacenter. Later in this tutorial, we export the secret and copy it into the secondary datacenter. This allows the secondary datacenter to negotiate WAN federation with the primary automatically.
Finally, use helm to install Consul with the hashicorp/consul chart.
$ helm install --namespace consul --values orion-rpi4-values.yaml consul hashicorp/consul --wait
This command will wait until everything is up and running, which may take a few minutes depending on your environment. When it finishes, we can have a look at what is created:
$ kubectl get services,pods -n consul
NAME                                  TYPE           CLUSTER-IP      EXTERNAL-IP      PORT(S)                                                                   AGE
service/consul-server                 ClusterIP      None            <none>           8501/TCP,8301/TCP,8301/UDP,8302/TCP,8302/UDP,8300/TCP,8600/TCP,8600/UDP   25m
service/consul-dns                    ClusterIP      10.43.38.87     <none>           53/TCP,53/UDP                                                             25m
service/consul-connect-injector-svc   ClusterIP      10.43.107.83    <none>           443/TCP                                                                   25m
service/consul-ui                     ClusterIP      10.43.112.100   <none>           443/TCP                                                                   25m
service/consul-mesh-gateway           LoadBalancer   10.43.74.58     <redacted>       443:31735/TCP                                                             25m

NAME                                                             READY   STATUS    RESTARTS   AGE
pod/consul-connect-injector-webhook-deployment-f645c9dcb-d8cnn   1/1     Running   0          25m
pod/consul-server-0                                              1/1     Running   0          25m
pod/consul-mesh-gateway-tunnel-client-57696f6b97-cpqbk           1/1     Running   0          24m
pod/consul-g9jtr                                                 1/1     Running   0          25m
pod/consul-mesh-gateway-5fdc965b69-v542z                         2/2     Running   0          25m
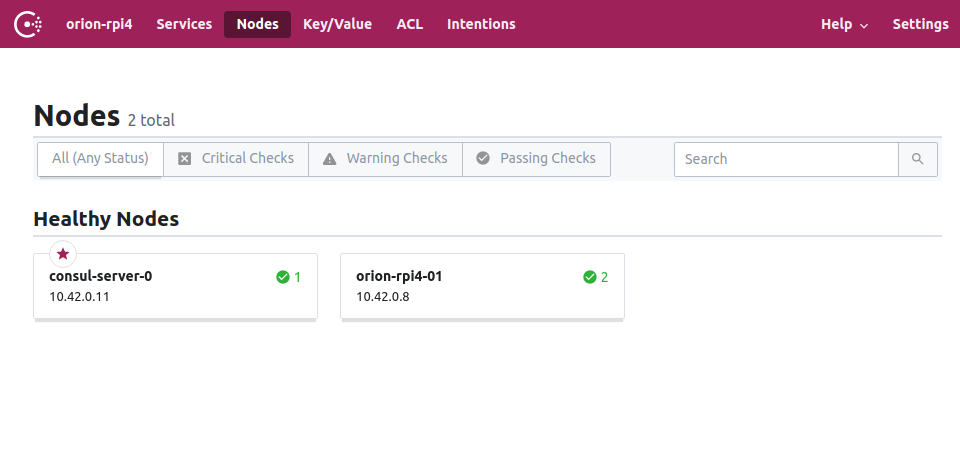
Looking great! Our first datacenter orion-rpi is ready to roll!
The Consul UI is not exposed, but we can always access it by port-forwarding to the Consul server pod kubectl port-forward -n consul consul-server-0 8501
Building the second datacenter on a public cloud
Now that we have a primary datacenter available, let’s start building a second cluster, this time on a public cloud.
Copying the secrets
Before switching to the second Kubernetes cluster, we have to export some secrets from the one we just installed.
$ kubectl get secret -n consul consul-federation -o yaml > consul-federation-secret.yaml
$ kubectl get secret -n consul consul-gossip-encryption-key -o yaml > consul-gossip-encryption-key.yaml
Together, those secrets have four values which are used by the Helm chart:
- caCert - contains the certificate of the CA to use for TLS communication.
- caKey - contains the private key of the CA to use for TLS communication.
- serverConfigJSON - contains the server information from Consul datacenter “orion-rpi4”, necessary to configure the WAN federation.
- a gossip encryption key
Now switch to the other kubeconfig context
$ kubectl config use-context orion-do
Switched to context "orion-do".
$ kubectl get nodes -o wide
NAME                STATUS   ROLES    AGE   VERSION   INTERNAL-IP   EXTERNAL-IP     OS-IMAGE                       KERNEL-VERSION          CONTAINER-RUNTIME
orion-do-01-3t6a0   Ready    <none>   99m   v1.18.8   10.133.0.4    <redacted>      Debian GNU/Linux 10 (buster)   4.19.0-10-cloud-amd64   docker://18.9.9
orion-do-01-3t6ad   Ready    <none>   99m   v1.18.8   10.133.0.3    <redacted>      Debian GNU/Linux 10 (buster)   4.19.0-10-cloud-amd64   docker://18.9.9
orion-do-01-3t6av   Ready    <none>   99m   v1.18.8   10.133.0.5    <redacted>      Debian GNU/Linux 10 (buster)   4.19.0-10-cloud-amd64   docker://18.9.9
When done, create the required namespace and apply the secrets.
$ kubectl create namespace consul
$ kubectl apply -f consul-federation-secret.yaml
$ kubectl apply -f consul-gossip-encryption-key.yaml
Deploy the second Consul datacenter
Next, just like before, prepare a values.yaml file for our second Consul deployment.
global:
  name: consul
  datacenter: orion-do
  image: hashicorp/consul:1.10.0
  gossipEncryption:
    secretName: consul-gossip-encryption-key
    secretKey: key
  tls:
    enabled: true
    caCert:
      secretName: consul-federation
      secretKey: caCert
    caKey:
      secretName: consul-federation
      secretKey: caKey
  federation:
    enabled: true

server:
  extraVolumes:
    - type: secret
      name: consul-federation
      items:
        - key: serverConfigJSON
          path: config.json
      load: true

connectInject:
  enabled: true

meshGateway:
  enabled: true
Some highlights here:
- a different datacenter name
- gossip encryption enabled with the same encryption key
- TLS encryption enabled (mesh gateways also require TLS encryption)
- Consul Connect enabled
- Mesh Gateway enabled
- WAN Federation enabled
- the private key and the certificate of the CA are loaded from the exported secret.
- extra server configuration is injected, setting the
primary_datacenterand theprimary_gateways.
And again, use helm to install Consul with the hashicorp/consul chart.
$ helm install --namespace consul --values orion-do-values.yaml consul hashicorp/consul --wait
Wait until all pods and services are available and verify the datacenters are connected. All the servers from both datacenters should be listed.
$ kubectl exec -n consul statefulset/consul-server -- consul members -wan
Node                        Address            Status  Type    Build   Protocol  DC          Segment
consul-server-0.orion-do    10.244.0.25:8302   alive   server  1.10.0  2         orion-do    <all>
consul-server-0.orion-rpi4  10.42.0.11:8302    alive   server  1.10.0  2         orion-rpi4  <all>
consul-server-1.orion-do    10.244.1.16:8302   alive   server  1.10.0  2         orion-do    <all>
consul-server-2.orion-do    10.244.0.135:8302  alive   server  1.10.0  2         orion-do    <all>
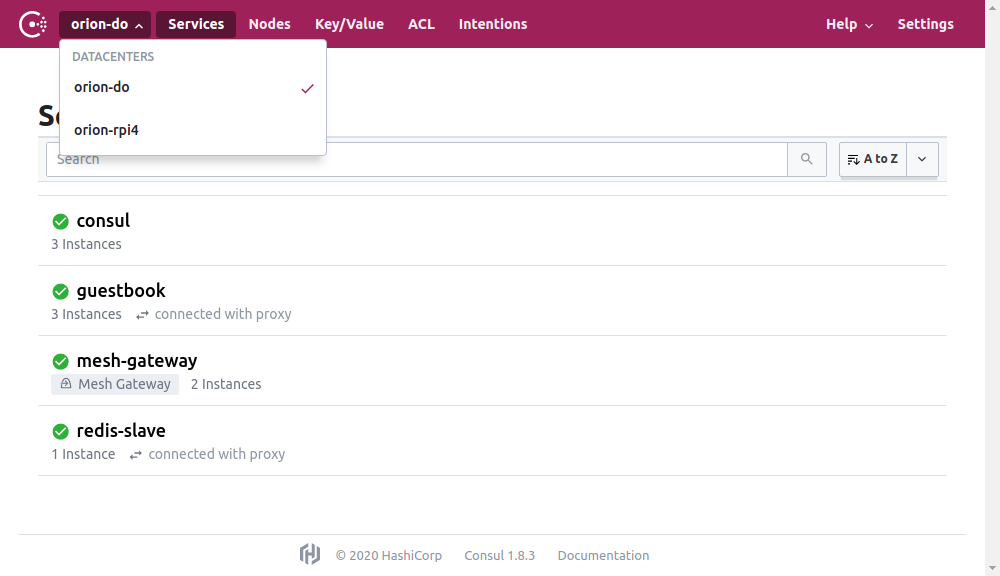
Lovely! They are all connected! Time to deploy some services …
Deploy a multi-tier application
Now that you have two connected Consul datacenters, you can deploy a service in each using kubectl.
We will deploy a guestbook application for this demo, which is already used many times to illustrate some Kubernetes features. It’s a simple multi-tier web application and consists of the following components:
- A single-instance Redis master to store guestbook entries
- Multiple replicated Redis instances to serve reads
- Multiple web frontend instances
In this case, the Redis master will be deployed to our primary datacenter because we want to store the data in our private home lab. The other services can be deployed on the public cloud datacenter, and all traffic passes securely through the mesh gateways.
Create a yaml file, redis-master.yaml, to define the “redis-master” service.
apiVersion: apps/v1
kind: Deployment
metadata:
  name: redis-master
spec:
  selector:
    matchLabels:
      app: redis-master
  replicas: 1
  template:
    metadata:
      annotations:
        'consul.hashicorp.com/connect-inject': 'true'
      labels:
        app: redis-master
    spec:
      containers:
      - name: redis-master
        image: redis
        command: [ "redis-server", "--bind", "127.0.0.1" ]
        resources:
          requests:
            cpu: 100m
            memory: 100Mi
        ports:
        - containerPort: 6379
The "consul.hashicorp.com/connect-inject": "true" annotation generates both the "redis-master" service and the sidecar proxy. The sidecar proxy can both accept and establish connections using Consul.
$ kubectl apply --context orion-rpi4 -f redis-master.yaml
$ kubectl get pods --context orion-rpi4
NAME                           READY   STATUS    RESTARTS   AGE
redis-master-c454f95d9-s5bft   3/3     Running   0          3m58s
Create two yaml files, redis-slave.yaml and guestbook.yaml, to define the “redis-slave” and the “guestbook” service.
apiVersion: apps/v1
kind: Deployment
metadata:
  name: redis-slave
spec:
  selector:
    matchLabels:
      app: redis-slave
  replicas: 1
  template:
    metadata:
      annotations:
        'consul.hashicorp.com/connect-inject': 'true'
        'consul.hashicorp.com/connect-service-upstreams': 'redis-master:16379:orion-rpi4'
      labels:
        app: redis-slave
    spec:
      containers:
      - name: redis-slave
        image: redis
        command: [ "redis-server", "--bind", "127.0.0.1", "--slaveof", "127.0.0.1", "16379" ]
        resources:
          requests:
            cpu: 100m
            memory: 100Mi
        ports:
        - containerPort: 6379
apiVersion: apps/v1
kind: Deployment
metadata:
  name: guestbook
spec:
  selector:
    matchLabels:
      app: guestbook
  replicas: 3
  template:
    metadata:
      annotations:
        'consul.hashicorp.com/connect-inject': 'true'
        'consul.hashicorp.com/connect-service-upstreams': 'redis-slave:26379,redis-master:16379:orion-rpi4'
      labels:
        app: guestbook
    spec:
      containers:
      - name: guestbook
        image: jsiebens/guestbook:v1
        env:
          - name: REDIS_MASTER_ADDR
            value: "127.0.0.1:16379"
          - name: REDIS_SLAVE_ADDR
            value: "127.0.0.1:26379"
        ports:
        - containerPort: 3000
The service definition includes two Consul specific annotations:
"consul.hashicorp.com/connect-inject": "true"- ensures that the service is deployed into the Consul service mesh with a sidecar proxy and automatically registered in the Consul catalog."consul.hashicorp.com/connect-service-upstreams": "redis-master:16379:orion-rpi4"- explicitly declares that the upstream service is “redis-master”. Note that the annotation value contains a segment that matches the upstream global datacenter name configuration entry.
And deploy these two services in the second Kubernetes cluster:
$ kubectl apply --context orion-do -f redis-slave.yaml
$ kubectl apply --context orion-do -f guestbook.yaml
The application is not exposed by default, but via port-forwarding, you can verify the application at http://localhost:3000
$ kubectl port-forward deployment/guestbook 3000
Conclusion
In this tutorial, we enabled three services in the Consul service mesh, in separate Kubernetes clusters, to securely communicate with each other over mesh gateways. We also secured WAN gossip server communication by routing traffic through the mesh gateways. One of the Kubernetes clusters is running on a Raspberry Pi in a private network. Its mesh gateway is securely exposed to the outside world using an inlets PRO tunnel created by a Kubernetes operator.
With this setup, we can deploy some heavy lifting workloads in a cloud environment and profit from all the cloud features available, like dynamically adding or removing compute resources when required, while having a small private datacenter to keep some data close to us.
What about Nomad?
Our current service mesh is built on Kubernetes, but it is also possible to connect another data centre running HashiCorp Nomad instead of Kubernetes. Perhaps that’s something for a next post.
So stay tuned!
See also:
- Building a Nomad cluster on Raspberry Pi running Ubuntu server
- Scale out your Raspberry Pi Nomad cluster to the cloud
References: