Quake III Arena, k3s and a Raspberry Pi

Yesterday I saw a tweet of Chris Campbell passing by in my timeline mentioning QuakeKube
Aah, the memories. Quake III Arena, one of my favourite first-person shooter games.
Years ago, I spent (and lost) so much time playing this fast-paced game with friends and foes, and now it is brought into the world of containers and Kubernetes with QuakeKube by Capital One Tech.
QuakeKube is a Kubernetes-ified version of QuakeJS that runs a dedicated Quake 3 server in a Kubernetes Deployment, and then allow clients to connect via QuakeJS in the browser.
Of course, I couldn’t wait to give it a try, especially after reading the documentation, saying:
Container images are being cross-compiled with Docker Buildx so it can run on hardware with different architectures and operating systems. Currently, it is building for
linux/amd64andlinux/arm64.
ARM64 support! Great, it means I can run it on one of my Raspberry Pis!
Let’s get fragging!
Most of the work is already done by others, so it will take you only a few minutes to get everything up and running with the proper tools and projects.
Prerequisites
- a Raspberry Pi with Ubuntu 20.04, which supports arm64
k3sup, a lightweight utility to get from zero to KUBECONFIG with k3s on any local or remote VM.arkade, a simple Golang CLI with strongly-typed flags to install charts and apps to your cluster in one command.kubectl- a DigitalOcean account and an API Token
Installation
First, install k3s on your Raspberry Pi running an arm64 OS like Ubuntu 20.04
$ k3sup install --ip 192.168.0.52 --user ubuntu --k3s-extra-args '--no-deploy servicelb --no-deploy traefik'
After installing k3s on the Raspberry Pi, k3sup also downloads the required kubeconfig file in your current working directory. Make sure to configure kubectl to use this config file:
$ export KUBECONFIG=$(pwd)/kubeconfig
Next, install the inlets-operator with arkade:
$ arkade install inlets-operator --provider digitalocean --token-file ~/do-api-token
The inlets-operator will create an inlets exit node on DigitalOcean, giving the LoadBalancer services in the private k3s cluster a public IP address.
Clients connect to the exit node via QuakeJS in the browser with WebSockets, and all traffic is securely tunnelled to the instance running on the Raspberry Pi.
Finally, take the example yaml file from the QuakeKube GitHub repository and make the appropriate changes. The service should be updated to a LoadBalancer instead of type NodePort, and of course, you can change the configuration to tweak the game preferences to your own needs.
Example of a QuakeKube yaml file:
apiVersion: apps/v1
kind: Deployment
metadata:
  name: quakejs
spec:
  selector:
    matchLabels:
      run: quakejs
  replicas: 1
  template:
    metadata:
      labels:
        run: quakejs
      annotations:
        prometheus.io/scrape: 'true'
        prometheus.io/port: '8080'
    spec:
      containers:
      - command:
        - q3
        - server
        - --config=/config/config.yaml
        - --content-server=http://localhost:9090
        - --agree-eula
        image: docker.io/criticalstack/quake:v1.0.7
        name: server
        ports:
        - containerPort: 8080
        readinessProbe:
          tcpSocket:
            port: 8080
          initialDelaySeconds: 15
          periodSeconds: 5
        volumeMounts:
        - name: quake3-server-config
          mountPath: /config
        - name: quake3-content
          mountPath: /assets
      - command:
        - q3
        - content
        - --seed-content-url=http://content.quakejs.com
        image: docker.io/criticalstack/quake:v1.0.7
        name: content-server
        ports:
        - containerPort: 9090
        volumeMounts:
        - name: quake3-content
          mountPath: /assets
      volumes:
        - name: quake3-server-config
          configMap:
            name: quake3-server-config
        - name: quake3-content
          emptyDir: {}
---
apiVersion: v1
kind: Service
metadata:
  name: quakejs
spec:
  type: LoadBalancer
  selector:
    run: quakejs
  ports:
    - port: 80
      targetPort: 8080
      name: http
---
apiVersion: v1
kind: ConfigMap
metadata:
  name: quake3-server-config
data:
  config.yaml: |
    fragLimit: 25
    timeLimit: 15m
    bot:
      minPlayers: 3
    game:
      motd: "Welcome to Critical Stack"
      type: FreeForAll
      forceRespawn: false
      inactivity: 10m
      quadFactor: 3
      weaponRespawn: 3
    server:
      hostname: "quakekube"
      maxClients: 12
      password: "changeme"
    commands:
      - addbot sarge 2
    maps:
    - name: q3dm7
      type: FreeForAll
      timeLimit: 10m
    - name: q3dm17
      type: FreeForAll
    - name: q3wctf1
      type: CaptureTheFlag
      captureLimit: 8
    - name: q3tourney2
      type: Tournament
    - name: q3wctf3
      type: CaptureTheFlag
      captureLimit: 8
    - name: ztn3tourney1
      type: Tournament
Apply the yaml manifest to your k3s cluster:
$ kubectl apply -f example.yaml
deployment.apps/quakejs created
service/quakejs created
configmap/quake3-server-config created
Wait until all pods are running and until the inlets-operator created the exit-node:
$ kubectl get pods,service
NAME                                         READY   STATUS    RESTARTS   AGE
pod/inlets-operator-76fb794578-s2fg4         1/1     Running   0          147m
pod/quakejs-tunnel-client-6f7c986dfc-mdt5w   1/1     Running   0          50s
pod/quakejs-786cc496b-g7b7n                  2/2     Running   0          80s

NAME                 TYPE           CLUSTER-IP    EXTERNAL-IP                       PORT(S)        AGE
service/kubernetes   ClusterIP      10.43.0.1     <none>                            443/TCP        152m
service/quakejs      LoadBalancer   10.43.46.33   143.110.174.204,143.110.174.204   80:32116/TCP   80s
And that’s it! Open up your favourite browser, load the application and start fraggin'!
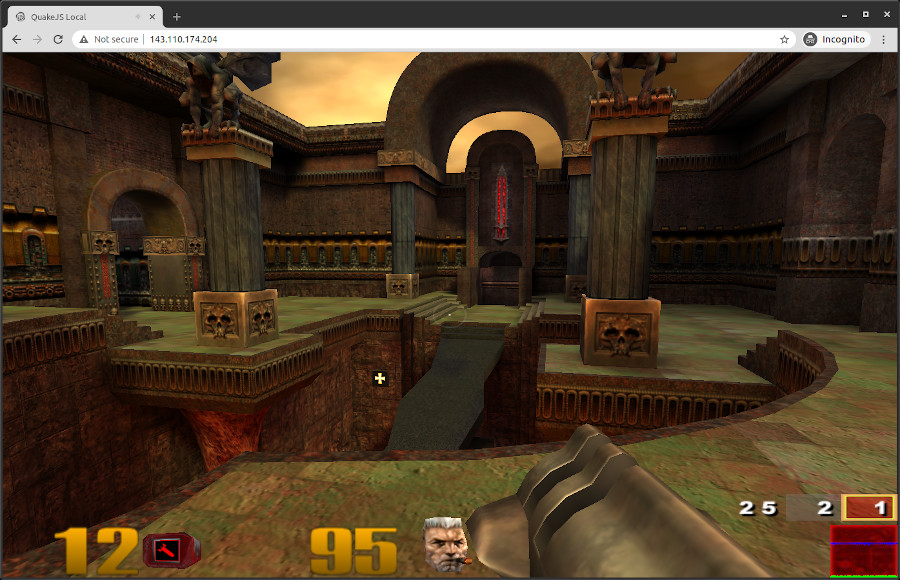
Quake III in the browser!
Add TLS with Let’s Encrypt and cert-manager
Lovely, with the current set-up we can start playing together with friends and foes.
But since QuakeKube doesn’t come with TLS by default, we are serving everything using plaintext HTTP. Wouldn’t it be better to add a little layer of security and start using HTTPS instead of HTTP? For this, we’ll use the NGINX ingress controller in combination with cert-manager to obtain a certificate from Let’s Encrypt.
First, install ingress-nginx and cert-manager with arkade:
arkade install ingress-nginx --namespace ingress-nginx
arkade install cert-manager --namespace cert-manager
The installation of the Nginx ingress controller includes a service of type LoadBalancer, meaning the inlets-operator will provide an exit-node for this service and provide a public IP address.
Wait until everything is provisioned, grab the public IP address of Nginx and assign it to your preferred domain.
$ kubectl get service -n ingress-nginx
NAME                                 TYPE           CLUSTER-IP      EXTERNAL-IP                       PORT(S)                      AGE
ingress-nginx-controller             LoadBalancer   10.96.116.75    165.227.238.209,165.227.238.209   80:31958/TCP,443:30621/TCP   38m
ingress-nginx-controller-admission   ClusterIP      10.96.168.158   <none>                            443/TCP                      38m
Next, install a certificate issuer:
apiVersion: cert-manager.io/v1
kind: Issuer
metadata:
  name: letsencrypt-prod
spec:
  acme:
    server: https://acme-v02.api.letsencrypt.org/directory
    email: <your email>
    privateKeySecretRef:
      name: letsencrypt-prod
    solvers:
    - selector: {}
      http01:
        ingress:
          class: nginx
Finally, expose the QuakeJS service via Nginx by deleting the existing LoadBalancer service and creating a new internal service and an ingress object.
$ kubectl delete service quakejs
The
inlets-operatorwill detect the removal of this service and as a result it will delete the previously created exit-node.
When the service is deleted, create the new one with an ingress configuration:
apiVersion: v1
kind: Service
metadata:
  name: quakejs
spec:
  selector:
    run: quakejs
  ports:
    - port: 80
      targetPort: 8080
      name: http
---
apiVersion: networking.k8s.io/v1beta1
kind: Ingress
metadata:
  name: quakejs
  annotations:
    kubernetes.io/ingress.class: nginx
    cert-manager.io/issuer: letsencrypt-prod
spec:
  tls:
    - secretName: quake-tls
      hosts:
        - quake.domain.com
  rules:
    - host: quake.domain.com
      http:
        paths:
          - path: /
            backend:
              serviceName: quakejs
              servicePort: 80
Wait a little bit until cert-manager has detected the ingress configuration and has issued a certificate for your domain.
And again, that’s it! Open up your favourite browser, load the application using HTTPS, and start fraggin'!
See also:
- Argo CD for your private Raspberry Pi k3s cluster
- Provision a Multi-Region k3s cluster on Google Cloud with Terraform
References: