A serverless appliance for your Raspberry Pi with faasd

photo by Luca Bravo on Unsplash
Intro
Serverless computing is not a new concept anymore. It is already quite known and nowadays getting more and more traction as all major cloud providers offer some serverless compute runtime, sometimes also referred to as a Function-as-a-Service (FaaS). AWS Lambda, Google Cloud Run and Azure Functions are some popular implementations.
Also in the Open Source community are some very popular implementations available, like OpenFaas. It allows you to build your Function-as-a-Service platform on top of Docker Swarm or Kubernetes, avoiding vendor lock-in. One of the unique selling points of OpenFaas is maybe its faas-provider interface. It makes the platform open for extension by allowing to add other runtimes like HashiCorp Nomad, AWS Fargate, …
The official providers are targeted towards Docker Swarm and Kubernetes, but there is a little sibling in the family of implementations, named faasd. “Little” in a sense that it is more lightweight, not because it has less features or is less powerful.
faasd is a single binary, but uses the same core components and ecosystem of OpenFaaS. Under the hood it uses containerd, which makes it ideal for a building a serverless home lab that doesn’t require much computing resources. Like a Raspberry Pi.
Installing faasd on a Raspberry Pi
To go from zero to a working faasd on a Raspberry Pi, it does takes some steps to follow. The installation of this lightweight serverless platform is already explained thoroughly by many others, like Alex Ellis and Mehdi Yedes, so I’m not going into detail here. In a nutshell, it comes down to this:
- download a Raspios (previously known as Raspbian) image and
- flash to an SD card
- boot a Raspberry Pi with the SD card
- ssh into the Raspberry Pi
- install dependencies
- containerd (not available for arm out-of-the-box)
- CNI plugins
- setup container networking
- install faasd
Now, those steps are not that hard to follow, and with some bash scripts or tools like Ansible, you can execute them in an automated way. But even with some automation, you still have to flash the image, boot the Raspberry Pi, find it’s IP address, … before you can start with the installation, automated or not.
In a virtual environment, like a public cloud provider, this is sometimes solved by baking an image with all required software pre-installed. When administrators create a new instance with such an image instead of a base OS image, the time between starting the machine and a working service ready to process request will be less, because no additional software will be installed during boot. This technique is known as Immutable Infrastructure, which allows you to scale up to meet demand in a fast and provable manner as possible.
What if we could build an image for a Raspberry Pi with faasd and all its dependencies already installed?
Building an appliance with Packer
One of the most popular tools for creating machine images is Packer from HashiCorp:
Packer is an open source tool for creating identical machine images for multiple platforms from a single source configuration. Packer is lightweight, runs on every major operating system, and is highly performant, creating machine images for multiple platforms in parallel.
The most obvious use case of Packer is building images for a virtual environment, such as AWS, GCP, VMware, Virtualbox, … and comes with many builders for various platforms by default. But luckily for us, one could easily extend Packer by adding custom builders. One of those custom builders is the packer-builder-arm-image created by solo.io, and guess what, it is for building custom arm images, especially for the Raspberry Pi.
Perfect! Exactly what I needed.
I grabbed all the bash scripts I was using before, put them in a Packer template, and started baking the new image with faasd and the dependencies.
{
  "variables": {
    "faasd_version": "0.8.2"
  },
  "builders": [
    {
      "type": "arm-image",
      "iso_url": "https://downloads.raspberrypi.org/raspbian_lite/images/raspbian_lite-2020-02-07/2020-02-05-raspbian-buster-lite.zip",
      "iso_checksum": "7ed5a6c1b00a2a2ab5716ffa51354547bb1b5a6d5bcb8c996b239f9ecd25292b",
      "iso_checksum_type": "sha256"
    }
  ],
  "provisioners": [
    {
      "type": "shell",
      "environment_vars": [
        "FAASD_VERSION={{user `faasd_version`}}"
      ],
      "scripts": [
        "scripts/install-cloud-init.sh",
        "scripts/install-faasd.sh"
      ]
    }
  ]
}
The Packer build will take some time, but as soon as it was finished, I flashed my custom image to an SD card and booted a Raspberry Pi. As expected, a few moments later, faasd was available and ready to deploy some functions.
Great, now I have an image I can reuse every time I want to create a new Raspberry Pi.
But wait… What about the OpenFaas credentials that get created when installing faasd? Aren’t they part of the image as well? It seems like the image isn’t that reusable after all.
Not only the OpenFaas credentials should be customizable, but maybe other users would also like to configure authorized ssh keys, or a unique hostname (because Raspbian has by default raspberry as hostname) or a static IP address, or maybe wifi configuration, etc. It was clear to me: to make the image reusable for anyone; I needed to find a way to easily customize the image after flashing it to an SD card.
Configure the SD card with cloud-init
In a previous blog post, I already mentioned the use of cloud-init to configure a Raspberry Pi. Unfortunately, cloud-init is not installed by default on Raspbian, but is available as a package in the apt repository. After adding the installation in the Packer template and running the Packer build, this is the new workflow to go from zero to faasd:
- get the image
- flash to SD card
- edit user-data
- boot Raspberry Pi
Eureka! An image with faasd that anyone can use without a hassle!
Exposing the private faasd with TLS
Ok, so now that we have that image, it is quite easy to start a new private faasd instance. Having a private faasd installation is great, but what if you have some functions that you want to expose to the outside world, like a webhook receiver?
Let’s add inlets, a cloud native tunnel that allows you to expose private endpoints to the Internet, to our little stack. inlets PRO will use TLS to provide link-level encryption to prevent snooping on tunnel traffic. Besides inlets, we also add Caddy to obtain a certificate, via Let’s Encrypt, for OpenFaas by tunneling out port 80 and 443 instead of the plaintext HTTP port 8080.
#!/bin/bash
set -e

ARCH=$(uname -m)
case $ARCH in
    arm64)
        SUFFIX=arm64
        ;;
    aarch64)
        SUFFIX=arm64
        ;;
    arm*)
        SUFFIX=armhf
        ;;
    *)
        echo "Unsupported architecture $ARCH"
        exit 1
esac

echo "=> Downloading and installing inlets pro ${INLETS_PRO_VERSION} ${SUFFIX}"

curl -SLfs "https://github.com/inlets/inlets-pro/releases/download/${INLETS_PRO_VERSION}/inlets-pro-${SUFFIX}" \
    --output "/usr/local/bin/inlets-pro" \
    && chmod a+x "/usr/local/bin/inlets-pro"

cat - > /etc/systemd/system/inlets.service <<'EOF'
[Unit]
Description=Inlets PRO
After=caddy.service

[Service]
EnvironmentFile=/etc/default/inlets-pro
ExecStart=/usr/local/bin/inlets-pro client --connect ${INLETS_CONNECT} --token ${INLETS_TOKEN} --license ${INLETS_LICENSE} --tcp-ports 80,443
Type=simple
Restart=always
RestartSec=5
StartLimitInterval=0

[Install]
WantedBy=multi-user.target
EOF

systemctl enable inlets
In the end, we have an image with:
- cloud-init
- faasd
- Caddy
- inlets PRO
How to use the image
To expose the faasd gateway running on a Raspberry Pi with inlets, you need to create an exit-node with a public IP. I find the use of inletsctl the easiest way to achieve this. Download the latest release or install it by running curl -sSLf "https://inletsctl.inlets.dev" | sudo sh
Next, create an exit-node on your favourite cloud provider, e.g. on DigitalOcean:
inletsctl create \
  --provider digitalocean \
  --access-token-file \~/access-token.txt \
  --region lon1 \
  --remote-tcp 127.0.0.1
The last flag, --remote-tcp, tells the inlets pro client where to send traffic, which in this case will be the loopback-interface. The inlets pro client is configured to punch out ports 80 and 443 out of the tunnel.
One thing left to do: get a domain ready for your faasd installation. Once you have a domain, required for Caddy to generate some TLS certificates with Let’s Encrypt, add a DNS A record with the public IP of the exit-node.
The final steps are, in fact, the same as before:
- get the custom image (cloud-init + faasd + caddy + inlets pro)
- flash to SD card
- edit user-data (OpenFaas credentials, inlets token, …)
- boot Raspberry Pi
#cloud-config

# Set your hostname here, the manage_etc_hosts will update the hosts file entries as well
hostname: faasd
manage_etc_hosts: true

# Add an authorized ssh key
ssh_authorized_keys:
  - ssh-rsa AAAAB3NzaC1yc2EAAAADAQABAAABAQDfkByGmwRUjUINP5pYu17yvX2qSdlgeaqlW5MrfsQqdj5WgWnddIPLnH8vFDA376JI3HpzkmZ99VdIJIseBDzv2WzRIE1KnmpzJkHAjY2t/pkxeTXxyBVjTMxg7+PR9Uc+05KcU2TdPAyTDradIsnk5+kPZenE9O3ZK85hEEXVWzbnQCxx4iaTWpXz+ufQ1pmueZDC1GfI+hRyMzALpPj6rkUh0rVsRYLtfDjtmh62dfm20wwZKY/eD4sMcXVsH2bJT1k9fPDQ62pYb7s7uQQTXV38RpkiEfPfhTTxOpLz9LMmovZ91I3ohkLaCFpNhQubEbrNnM2EhNDkdIsObxYH faasd-rpi

write_files:
# Configure faasd basic auth user and password
- path: /var/lib/faasd/secrets/basic-auth-user
  content: faasd-admin
- path: /var/lib/faasd/secrets/basic-auth-password
  content: "++01=health=MISS=system=53++"
# Configure inlets pro
- path: /etc/default/inlets-pro
  content: |
    INLETS_DOMAIN=<your domain for faasd>
    INLETS_CONNECT=<your inlets pro remote, e.g. wss://243.15.53.46:8123/connect>
    INLETS_TOKEN=<your inlets token>
    INLETS_LICENSE=<your inlets pro license>
And enjoy your private faasd instance with a public endpoint!
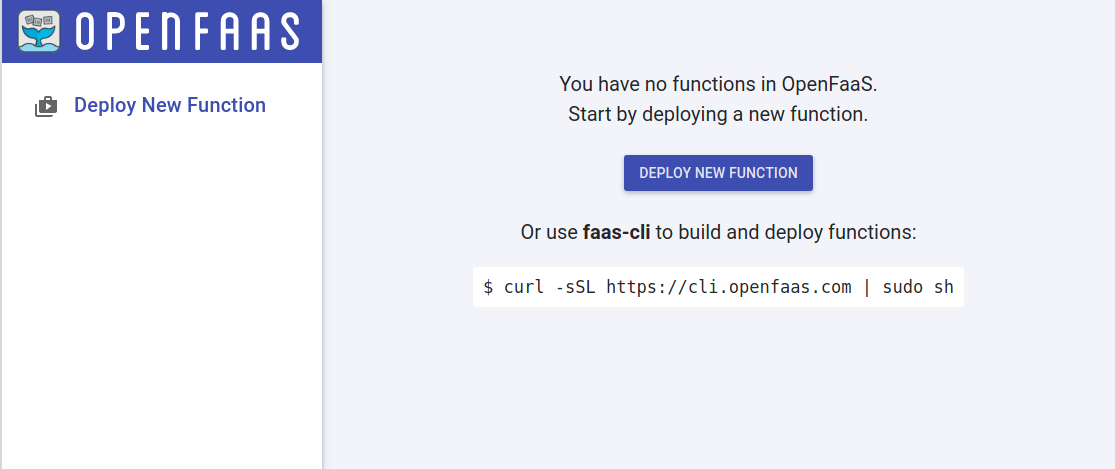
OpenFaas ready to go
Conclusion
With Packer and a custom builder, we created a custom Raspbian image with faasd some extra software to bootstrap a faasd instance on a Raspberry Pi exposed with a public endpoint. I must admit I didn’t stop there. In the end, my git repository contains everything to build three variants of the image:
- one with only faasd (ideal for private workloads)
- one with faasd and inlets OSS
- and one with faasd, Caddy and inlets PRO
I needed a 64bit version as well, so new releases are eventually added based on the Ubuntu server images for Raspberry Pis.
You can find everything in the git repository to build the images by yourself, or you can download them from the latest release.
References: